


 Chowwai Cheung
 Fred Ingrams
 Sophie Green
 Day Bowman
 Daisy Cook
 Halima Cassell
 Barbara Rae
 Patrick Hughes
 Bruce Mclean
 Nelson Makamo
 Sandra Blow
 Tracey Emin

Follow a step-by-step approach to decorating your walls, covering everything from proper placement to managing different surfaces and styles.

Get the look with art from John Bingham and Geoffrey Ansel Agrons (courtesy of Mode d'amour)
Where to Hang Wall Art
One of the hardest parts of learning how to arrange art on a wall is figuring out where you want to put it in the first place. Here are some suggestions:
Hanging Artwork Over a Mantlepiece or Fireplace
A great place to hang artwork is over a mantlepiece or fireplace. This is especially true for large centrepieces you want to draw attention to but also for smaller collections.
If the artwork is placed too close to the mantlepiece, the display can appear cramped or cluttered. Try to keep a gap separating your pieces and the ledge – around 15 cm minimum.

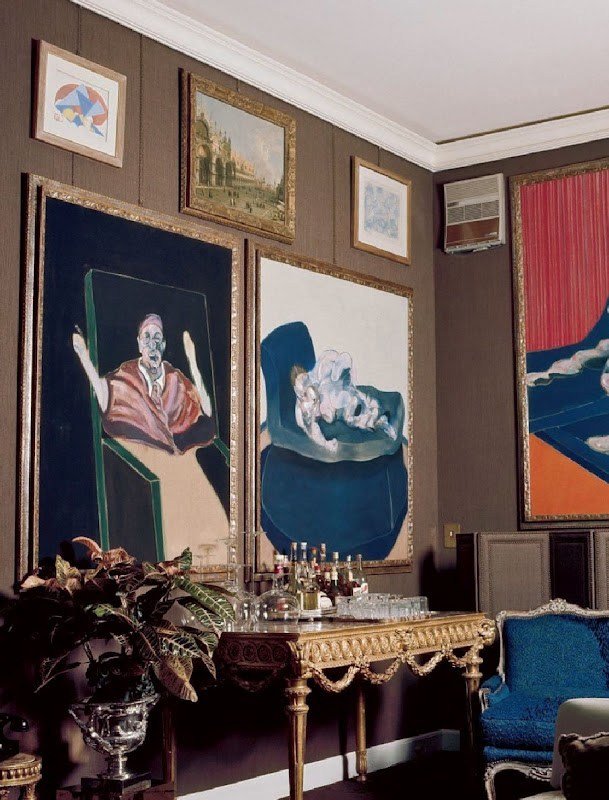
Get the look with our collection of black and white abstract paintings (courtesy of La Dolce Vita)
Hanging Artwork Over Furniture
As a general rule of thumb, any art placed over furniture should not extend beyond the furniture width. You want your art to cover around half or three-quarters of the length of the appliance. As with the latter arrangement, make sure that you have a fair amount of space between your furniture and the artwork.
Get the look with art from Lee Ellis (courtesy of Scala Regia Archives)
Creating a Gallery Wall
A simple way to invite style and personality to any room is with a gallery wall. A gallery wall arrangement is a curated display of photographs, posters, prints or paintings, creatively presented on a wall, usually with photo frames. You can organise gallery walls around windows, door frames and cabinets.
Short on space? For smaller apartments, gallery walls are the perfect way to give a room authenticity, depth and a curated-decor feel without taking up any floor space.
Too much space? An even group of pieces can balance out large areas or a high wall, reducing any sense of emptiness and adding character. Large rooms can handle slightly larger spacing than small spaces, so you have the creative license to spread your work out more.
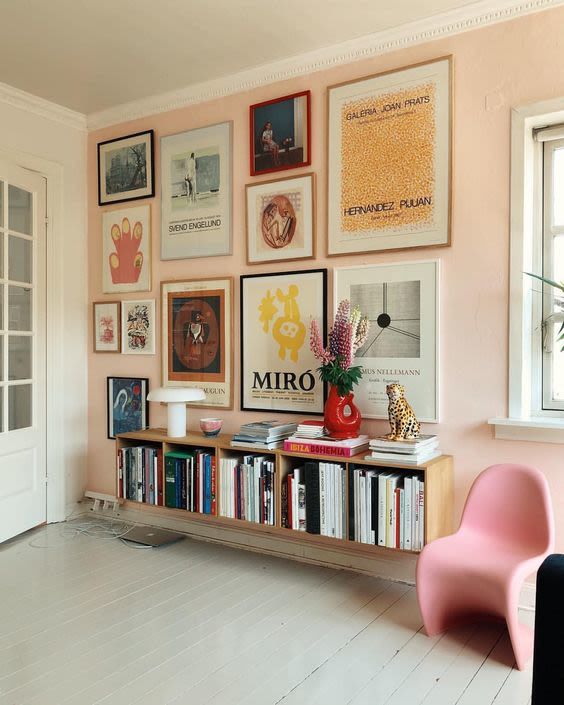
Image courtesy of Gray Malin
How to Arrange Art on a Wall
Consider the feeling or energy you want to spark in your room. Investing in symmetrical, grid-like art formations can evoke a clean, crisp and formal feel, whereas flexible, asymmetrical arrangements can be a little more edgy and off-the-cuff.
For symmetrical formations, consider a triple whammy or four-part structure. You can place three equally shaped pieces in-line with one another. Looking for something a little more experimental? Rather than aligning your trio horizontally, try placing them vertically.
Top tip: Don't have a ruler? Try using your hand, with fingers closed, to judge the width between each piece.

Get the look with this painting from Peter Horvath (courtesy of Hunker)
Another option is to create a square or rectangular composition with four evenly shaped artworks. For smaller works, why not formulate multiple square formations across your wall?
Top tip: For symmetrical hangings, keep an even and tight spacing between them.
For more asymmetrical arrangements, you can arrange pictures on a wall on a slant. For example, if you have a shelf, you can display your works in a sliding pattern over or around it. Working with a duo? Try staggering them by fixing one lower than the other, ensuring that the top and bottom aren't aligned. Working with multiple pieces? Place the largest piece(s) at the bottom and work your way up to the smallest.
Alternative Wall Hanging Ideas
Anchor your pictures on an imaginary vertical line to avoid unbalanced, messy walls while maintaining a modern, alternative style. Assure that your art is visually balanced on both sides of the vertical line. In other words, check that all the outer facets are level and even.
For this kind of gallery display to be captivating, it should have the look and feel of being collected. So, take your time acquiring your finds.
You can organise your wall hanging based on a unifying colour scheme. You can also tie disparate pieces together based on style or media, such as black-and-white photography and monochrome prints.
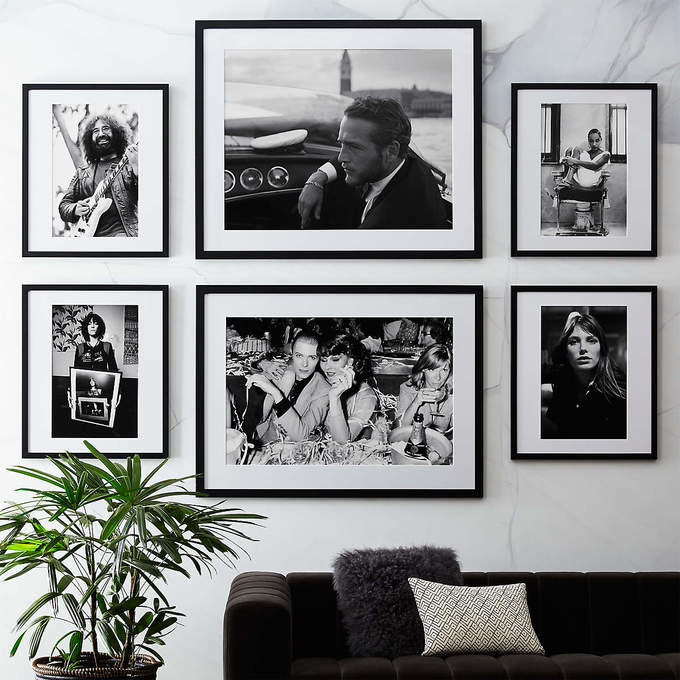
Get the look with photography from Andy Gotts (courtesy of Pinterest)
How to Hang Wall Art Depending on Your Surface
Not all walls are built equal! You need to know what kind of surface you're dealing with before getting out your hammer and nails.
How to Hang Wall Art on Drywall
For surfaces other than wood, your typical screw or nail will suffice. The majority of walls are, however, hollow and covered with soft plaster or drywall. The pillars, also known as studs, behind plaster or drywalls should provide sufficient support for any wall hanging. However, these studs can be hard to locate and are not necessarily in the right position. You will, therefore, need to hunt down some hardware hangers designed for hollow walls.
Art Hanging Hardware
When learning how to arrange art and paintings on a wall, you need the right hardware. Below we have explained the best tools to use depending on your type of wall and art.
Hangers and Nails
Lighter or smaller items, including picture frames and canvases, can be safely hung with a nail without a stud. We suggest purchasing a picture hanger to use with your nails.
-
Check the package for the weight limit your hanger will hold.
-
Place the bottom of the hook or hanger on the fixing point (where you would like to hang it).
-
Taking a smaller hammer, gently hammer in the nails.
Top tip: For larger frames, it is often advisable to use a pair of picture hangers.
Anchors
Drywall anchors are really effective tools for supporting hanging structures. A drywall anchor is an insert that, when combined with the relevant screw, can form a sturdy mount anywhere on a drywall panel or hollow wall. The anchor goes between the screw and the drywall, clasping the drywall more efficiently than a screw would alone. Refer to the packaging instructions for the correct screw size and attachment instructions.

Image courtesy of Pinterest
Bolts
You can use toggle bolts and molly bolts on drywall. These bolts are screw fasteners you can rely on to fasten artwork to plaster or hollow walls. These are great for heavier pieces; some molly bolts can hold up to 50 lbs.
Alternatively, just like wall anchors, you can install a toggle bolt by drilling a pilot hole and then lightly tapping the toggle bolt into position. The more you tighten the bolt with your screwdriver, the more the bolt's wings will expand and press against the back of the wall. These are also better for heavier works.
Adhesive Strips
Apprehensive about drilling any holes? You can always use adhesive strips. These can be purchased from most hardware stores.
-
Take your strips – you will need some for the wall and some for the back of your frame.
-
Prior to sticking anything on your wall, apply rubbing alcohol to your wall (if possible) to remove any oily residue.
-
Remove one side of the lining and press the now sticky part against the wall. Do the same to the rear of your frame(s), positioning the wall and frame strips so that they can align.
-
Leave for 30 minutes or so to ensure adhesive hold. Some adhesive strips will require longer, so check the instructions of your purchase.
-
Align the wall and frame strips and press each pair of strips together until they click and stick.
Get the look with art from Fintan Whelan (courtsey of Pinterest)
How to Hang Wall Art on Concrete Walls
For concrete walls, you will need to use sturdier hanging tools. Consider using lead wall plugs, available at most building supply stores, to support a hanging screw. You will need a power drill with a carbide-tipped part. This will be used to form a hole for the plug. Once you have made the hole, carefully put the drill into place and insert the screw.
How to Hang Art on a Wall With Panelling
Panelled walls are great surfaces for hanging pictures. You will need hooks to attach to the panels and wire or string attached to the back of your canvas or frame. You can easily fasten a line of material using hooks or adhesive strips to the rear of the work if none reside there already. Then, drape your art along the edge of the panel, securing it in place with the thread and panel hooks.

Image courtesy of Pinterest
More Tips for Arranging Wall Art
-
Know your arrangement before putting a hammer to the nail. Lay your pictures or canvases out on a table or on the floor first.
-
Do not be afraid to experiment and move your pieces around a few times.
-
In most cases, it is best to hang artwork at eye level. If you plan on displaying a group of pieces, make the centre of the group eye-level.
-
For dining room art, consider hanging your decoration arrangement a little lower – this way, you can enjoy looking at your art while sitting down.
How to Arrange Pictures on a Wall
Arranging wall art is ultimately all about preparation. Once you have created an arrangement, understand how heavy your art pieces are and the type of wall surface you want to arrange them to. At this point, make sure that you have the correct art hanging hardware to safely mount your artwork without damaging the art or wall.